|
Download Motters Custom Car Tut Here
This will be the first tutorial on the basics of bringing in a 4x4 Evo car into flatout2.
This will get your car from Evo onto the track the fastest way possible. From there I will add more lessons. Such as
detaching parts, adding in more detail, how to pick a decent model, UV mapping and more.
So lets get started the model I am working with is a 1976 Olds Cutlass done by Grungy Harry and converted to EVO by
Turbo. As always Turbo was kind enough to give me permission to convert this
to FO2
Step 1. Download a program called Podview. This file will help you extract all the model details, and textures. Podview
is provided in the Tutorial package
Step 2. Download Zmodeler 1 and have a registered version of Zmodeler2. Also for this lesson you should have a copy
of Photoshop.
Step 3. Lets Download our Car, One place that’s excellent to find some cars your looking for is http://vales.com KC’s is kind enough to have a vaste
storage tank of cars for EVO and EVO 2. One of the reasons I picked this game as my first tutorial is EVO cars do not come
with a lot of extra junk. Unlike GTA cars yet the game seems to be able to handle pretty high detailed models.
Step 4. Get the Authors permission before you start working on your car. I have found that 9/10 Authors will give there
permission to do there cars in other games. But you always have one or two that really are not interested in you doing anything
with there cars.
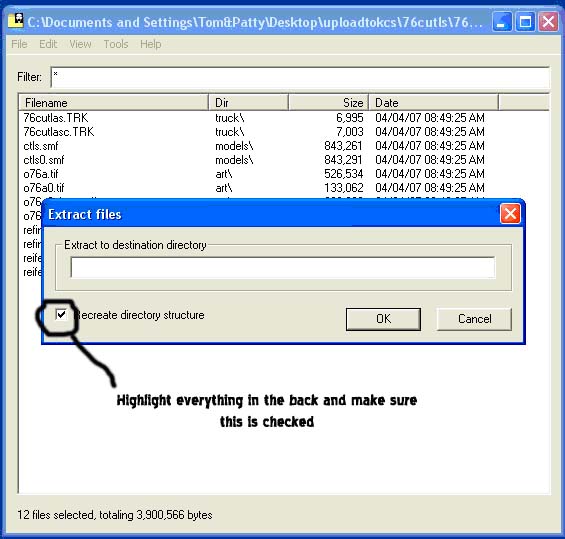
Step 5. Once you have downloaded your car you need to open the car up with podview.
Open the file and make sure you click the extract all button then click OK.
Step 8. At this point you either have a car or a tire. More often then not depending on what the artist saved it as
you can tell whats what. As we are working with the Cutlass it was pretty easy to figure out above. Now we should have the
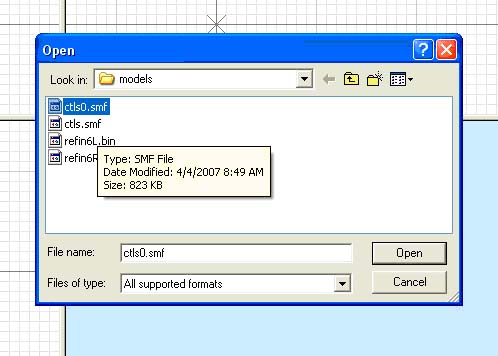
car loaded into zmodeler1 at this point if I like the car I save it as a file in this case cutlass.
Hit file save as and type in cutlass.
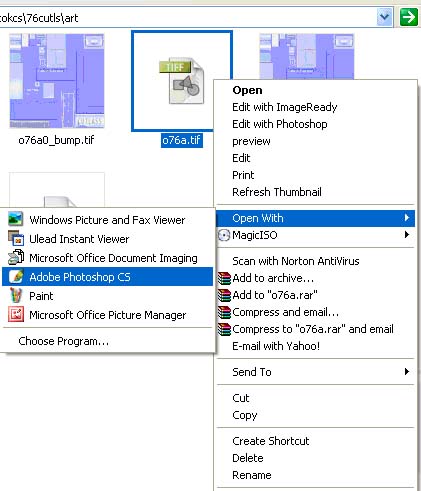
Step 9. Close out zmodeler1 and lets look into the art files that extracted when we used podview. EVO uses raw and
tif files for art. The raw files are for tires and the tif files are for the car. There should be 4 maybe more of these. The
one we are looking for is the tif file that is at least 512x512. We are going
to open up our tif file using photoshop.
Once we have it open we are going to save this as a TGA file so that flatout2 knows what it is. Since this is our
primary file it should be saved as body.tga.
Make sure to save this as the body.tga in the car_90 folder
as well.
It also makes sense to make a skin1.dds and a skin1_damaged.dds at this time as well.
Both of these should be placed in the car_90 folder provided as well.
Step 10. Opening our new car in zmodeler2, Ok open your copy of zmodeler2 and get your car opened up. Once were in
there we are going to apply our cars texture.
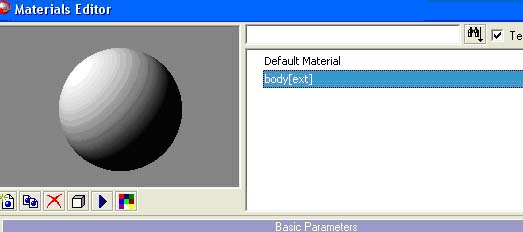
Find your round red circle at the top of zmodeler and open that up.

Your going to see two items listed in the box at the top. 1 is default
and 2 should be texture material, we are going to change this to body.
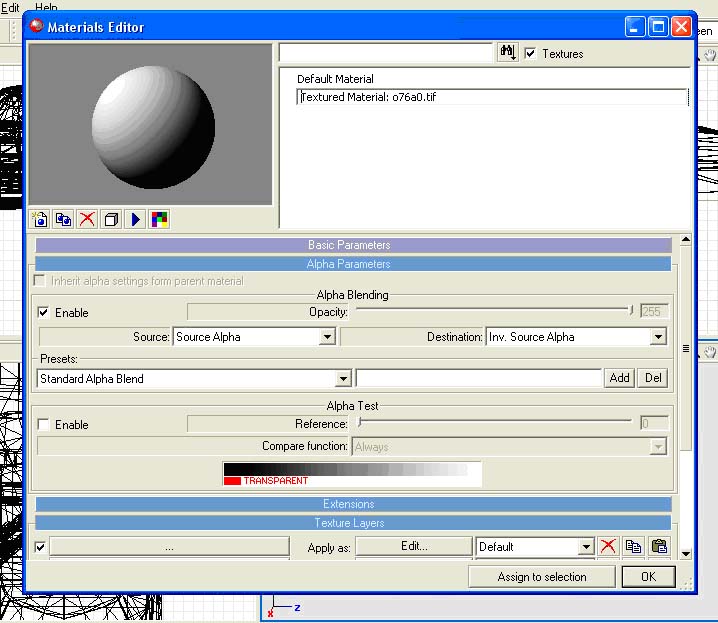
Ok now that that’s done we are going to add in our new body texture.
In the same window we are going to scroll down and add in the body texture….
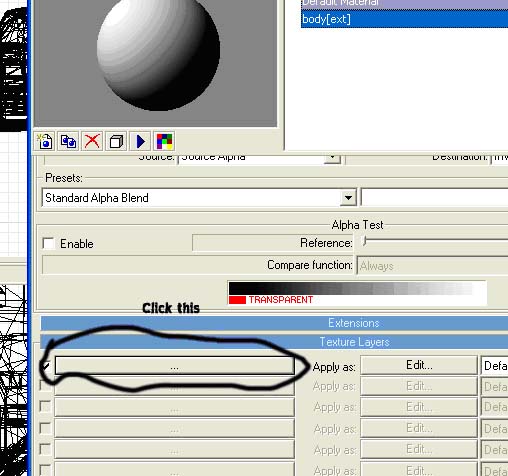
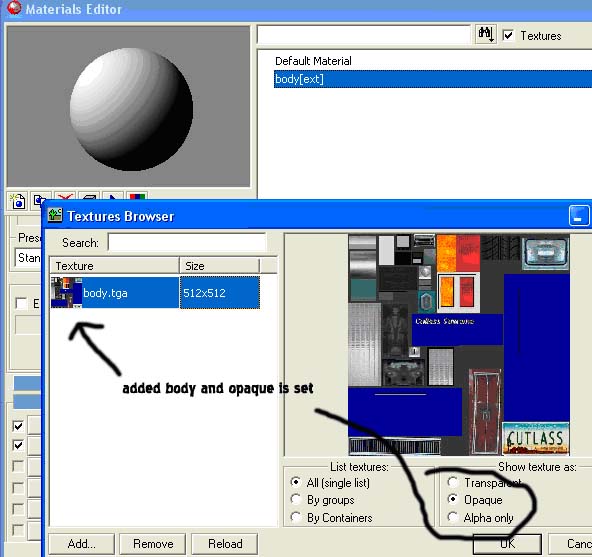
A new window will open and what you need to do is click add, Find your new body texture we just made body.tga and add
it to the spot. Make sure that it is set to opaque not transparent. And we should be all set. Click ok and head back to the
main screen.
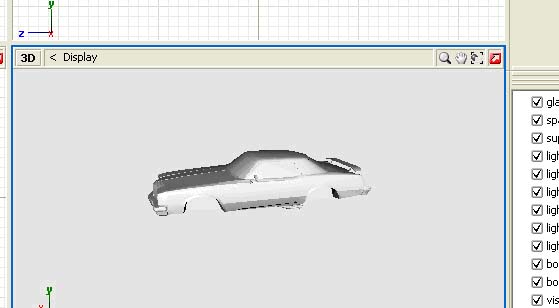
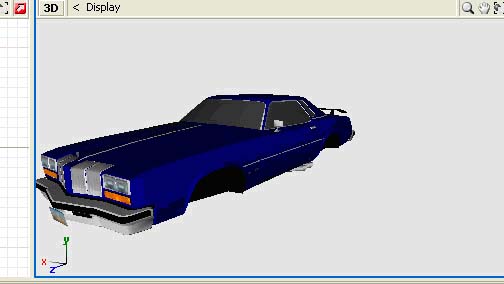
This is what should have happened to the car.
Step 11.
Now that we have the texture added to the car we are going to do the process of attaching the items needed to get this
car straight into flatout2 and delete the items we do not need.
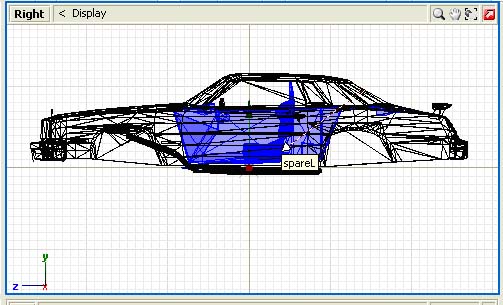
Lets look at our list of parts.
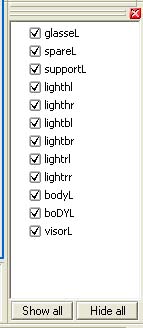
Often in EVO the car is only slightly broke up. Maybe the interior is separated
or the windows are separated. Overall the car is basically a box with a few extra parts. As an example the visorL is
the fin on the back of the car. The items on these cars marked lightrr, lightrl etc are for EVO to define actually headlights
and taillights in the game.
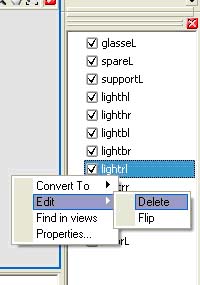
Those we can get rid of now. Right click on the item and hit edit and delete.
Step 12, Review your other items and make sure they are all parts that you want. For me after getting rid of the light’s
items I found everything else will make the car look good and I want to keep. This car is on the lower poly side so there
is nothing I need to eliminate.
Step 13 Attaching items.
As we are trying to get this car in game as quickly as possible and I am trying to teach the basics of Car Modeling
I will be looking to have just one part. The body…..
So what we need to do now is get ourselves down to just that.
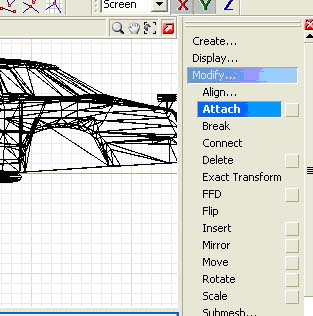
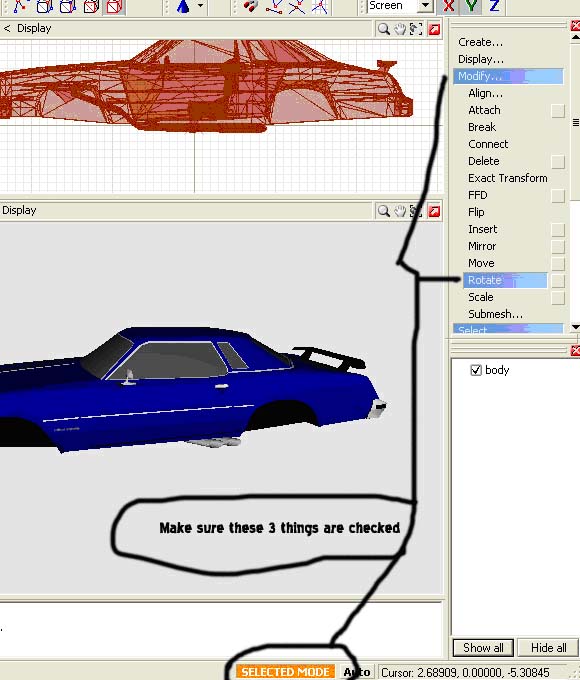
Go up to the Modify tab and click the attach button. Now we are going to click on the cars parts in the screen and
start leading one part into another till we only have 1 left.
Just like so click on one part and then click on another. If your doing
it right you will start to see your parts disappear from the list below. If your having trouble finding all the parts in the
right hand screen click the check box next to the part to make it disappear so that you can click on the hidden part.
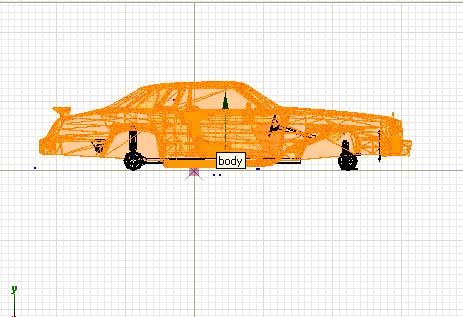
Step 14 At the end you should have just one part left. Its time to change the name of this part to body.
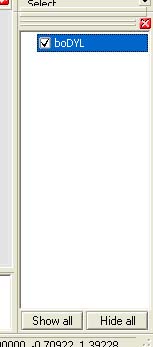
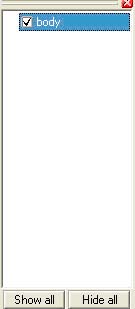
Ok,
Now we have what we need to have one crash part for FO2. With this we will have no open doors, no trunk, no hood nothing
will remove from the car but that’s kinda the idea of getting you all started. Just teaching the basics of zmodeler
here and just teaching how to get a car into FO2.
Step 15: At this point you should have downloaded Mottersmergeparts zmod file. Lets open this up and take a look at
it. You can keep two different versions of zmod2 open at the same time. So just click on that file name and it should pop
open.
This file is going to give you all the nessesary parts for FO2 Shocks wheel hubs etc.
Its also going to give you some basic new textures if you look in your red circle.
These will be common, shocks, lights, etc. As you can see most of the parts are grey and textures need to be assigned
to them. In the starter pack I gave the common I use often on my cars. You need to assign that common texture to your Shear
and your Common.
Light needs the light2 file in the starter pack assigned to it. And Shock and Spring need the Shock found in your unpacked
version of flatout2 assigned to it.
(tip: zmodeler does not always like .dds files. You may have to open these up with photoshop and make .tga files. I.E
open shock.dds and hit file save file save as shock.tga. Keep your .dds file do not delete that as the game looks for .dds
files.).
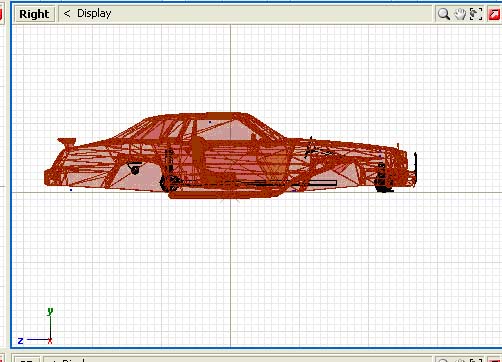
Step 16: Lets go back to our Cutlass what I would like you to get to is our top view…
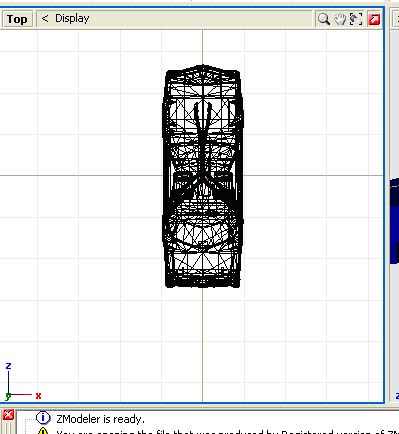
What we need to do now is get this car facing the correct direction for FO2 as Evo seems to see these cars in a different
direction then FO2. We need to goto our menu and hit select all.
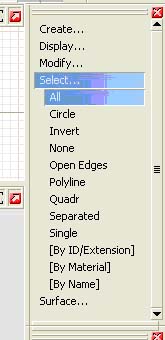
Then from there we are going to the top view and clicking anywhere in the box till we see that the car is highlighted.
Right clicking on the box works for that.
Now what we are going to do in the top view is put our mouse on the right side of the car..holding down the ctrl button and the left mouse button, Now we drag
downward the car should start to rotate like this.
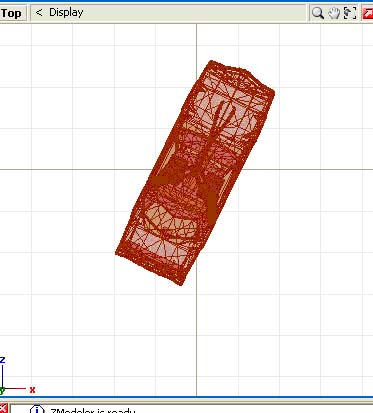
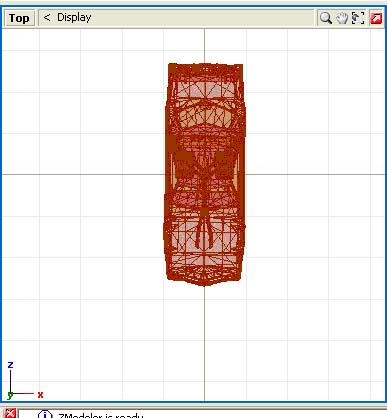
Once you have finished the cars nose should be pointed completely south.
Step 17:
Now lets keep the car highlighted and merge in our Mottersmergeparts.
Go up to our file button at the top left hand side. Click file/merge
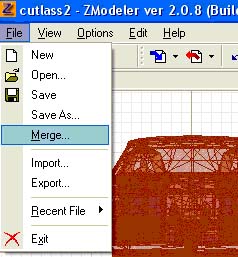
You may have to find where you saved the zmod file named mottersmergeparts.
Once you do click on that file.
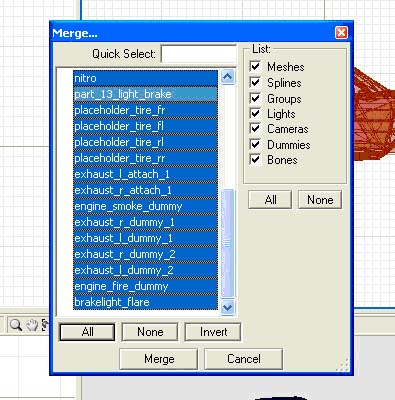
A list of everything in that file will come up make sure all your boxes are checked on the right and hit the All button. Then click Merge.
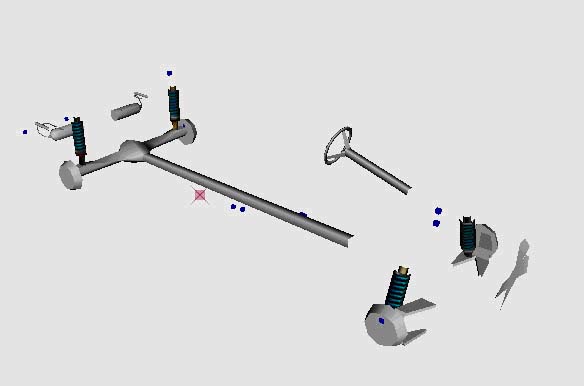
This is how my parts came into zmod…
Not really a perfect fit.
As you can see the wheel hubs really didn’t line up to well.
What we need to do is move the body to match up to the hubs.
Lets click on the Modify button and then click move again.
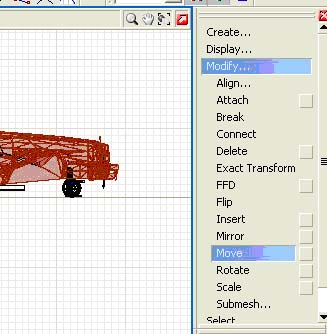
Now all we need to do is scroll our mouse over the car in the right hand view and try to line up the wheel hubs with
the body.
Its not a perfect fit but it will work.
Step 18:
We need to make a damaged part for the body. So what we are going to do is hit the create button in our menu tab.
Then hit copy……
Ok at this point highlight the “body” and click on it your car may change colors but it really doesn’t
look like much happened. Go to your parts list and scroll all the way to the bottom.
There it is…..a new body.
Lets click on the body and change the part name to body_crash
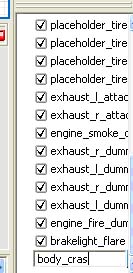
We now have our body_crash file. This is the part in later tutorials I will show you how to make damaged.
Step 19:
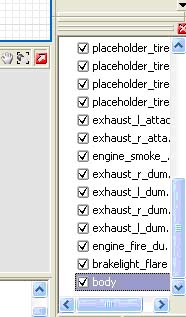
For now were going to make sure each of the textures are assigned lets click the red ball again and go thru the list.
What we are looking for is to see that each of our new imported parts has one texture assigned to it.
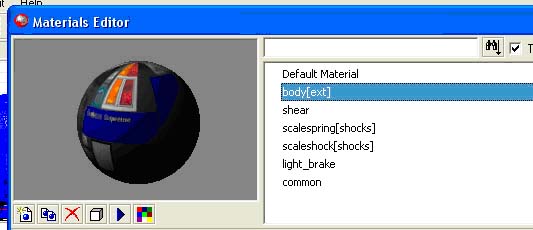
When its assigned you will see the image on the ball in the photo above.
If not the ball will be grey.
Go thru each of the listed textures and make sure they are all assigned to the ball once you have finished this make
sure the images are all set for opaque. and hit ok.
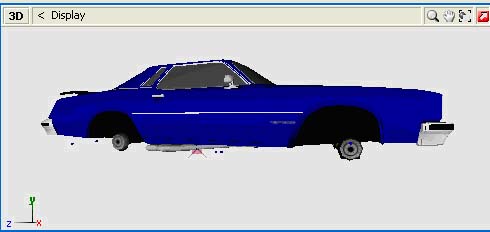
When we get back to our body you should no longer see any of the items left blank.
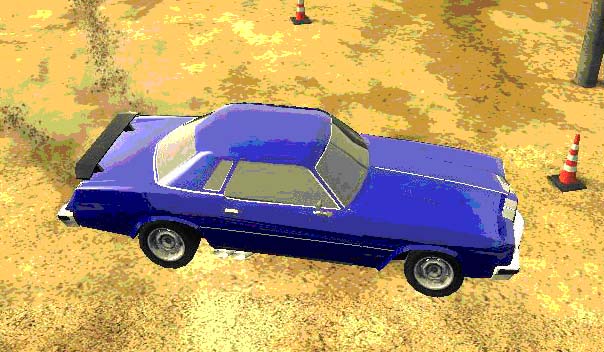
The car should look something like this in your 3d view.
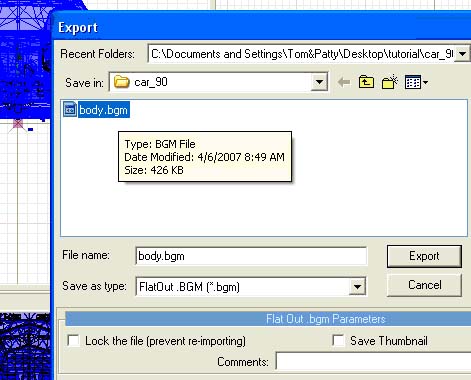
Step 20: Ok now that we have everything on the car and all the proper textures are assigned. All we need to do is export
this car to the folder provided for this. In the tutorial folder you downloaded. We are going to hit file/export and export
this as a body.bgm file.
Ok once that is done we are going to save our zmod file and exit out.
We need to copy the car_90 file to our unpacked game also copy any shared textures to your shared folder inside your
unpacked game.
We are all set start up your unpacked game and test your car out.
You should be good to go.
List of tools needed
Zmodeler 1
Zmodeler 2
dds Viewer for Photoshop
Photoshop
Podview
|